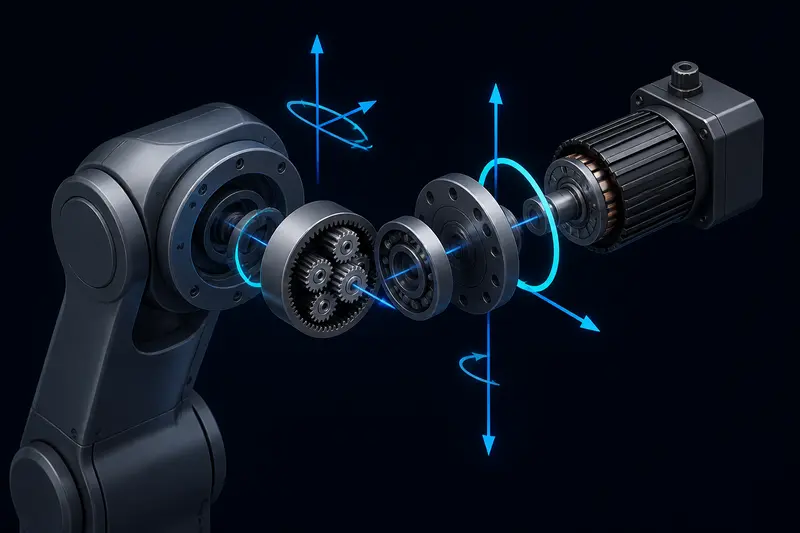
Picking a motor and gearbox for a robot arm joint before you have built anything is mostly guesswork unless you actually run the numbers. Undersize it and the joint stalls or overheats under load; oversize it and you are paying for weight, cost, and current draw the joint never needs. Motor and gearbox sizing for a robot arm joint comes down to one core exercise: find the worst-case torque the joint will ever see, add a safety margin, then pick a gear ratio and motor combination that clears that number on continuous duty, not just peak. This article works through that full chain with a concrete link, motor, and gearbox so you can plug your own numbers into the same steps.
Step 1: Find the Worst-Case Load Torque
The worst case for almost any arm joint is the arm fully extended horizontally, holding the heaviest payload it will ever carry, at the joint closest to the base (the shoulder carries everything downstream of it). Two components add together at that moment: the static torque from gravity, and the dynamic torque from acceleration.
Static (gravity) torque for a link of mass m_link and length l, plus a payload mass m_load at the end of the link, both acting at their respective moment arms:
tau_static = m_link * g * (l / 2) + m_load * g * l
Dynamic torque from angular acceleration comes from the joint's total moment of inertia about the pivot. Treating the link as a uniform rod pivoting at one end (inertia = m_link * l^2 / 3) and the payload as a point mass at the tip (inertia = m_load * l^2):
tau_dynamic = (m_link * l^2 / 3 + m_load * l^2) * alpha
where alpha is the target peak angular acceleration in rad/s^2, a number you choose based on how snappy you want the joint's motion profile to be (see trajectory planning for robotic arms for how acceleration limits get set in the first place).
Step 2: Worked Numeric Example
Take a shoulder joint with link mass m_link = 0.6 kg, link length l = 0.35 m, a payload of m_load = 1.0 kg at the tip, and a target peak acceleration of alpha = 4 rad/s^2.
tau_static = 0.6 * 9.81 * (0.35 / 2) + 1.0 * 9.81 * 0.35
           = 0.6 * 9.81 * 0.175 + 1.0 * 9.81 * 0.35
           = 1.030 + 3.434
           = 4.464 N*m

I_total = 0.6 * 0.35^2 / 3 + 1.0 * 0.35^2
        = 0.6 * 0.1225 / 3 + 0.1225
        = 0.0245 + 0.1225
        = 0.1470 kg*m^2

tau_dynamic = 0.1470 * 4
            = 0.588 N*m

tau_worst_case = tau_static + tau_dynamic
               = 4.464 + 0.588
               = 5.052 N*m
That 5.05 N*m is the torque the joint output has to deliver at the single worst moment in its duty cycle: fully extended, loaded, and accelerating hard.
Step 3: Apply a Safety Factor
Real joints see friction losses, gearbox efficiency losses, underestimated payload, and control transients the simplified model above does not capture. A safety factor of 1.5 to 2.0 on the worst-case torque is standard practice for a first build; use the lower end if your mass and length numbers are measured accurately, the higher end if they are rough estimates.
tau_design = tau_worst_case * safety_factor
           = 5.052 * 1.5
           = 7.58 N*m
This 7.58 N*m, not the raw 5.05 N*m, is the number the gearbox output actually needs to sustain.
Step 4: Choose a Gear Ratio and Check the Motor
A small brushless or geared DC motor suited to a hobby arm typically has a continuous stall torque in the range of 0.05 to 0.3 N*m at the motor shaft, before any gearing. To reach 7.58 N*m at the output, the required gear ratio (ignoring efficiency for a first pass) is:
ratio_required = tau_design / tau_motor_continuous
For a motor rated at 0.12 N*m continuous torque:
ratio_required = 7.58 / 0.12 = 63.2Gearboxes come in fixed ratios, so round up to the nearest available stage, for example a 70:1 planetary gearbox (see harmonic drive vs planetary gearbox for how to pick between gearbox types once you know the ratio range you need). Rounding up rather than down leaves margin instead of eating into it. Then apply the gearbox's rated efficiency, typically 70 to 90 percent for a planetary stage, to check the actual delivered torque:
tau_delivered = tau_motor_continuous * ratio * efficiency
              = 0.12 * 70 * 0.85
              = 7.14 N*m
That comes in just under the 7.58 N*m design target, so this specific motor and ratio combination is undersized once efficiency is accounted for. The fix is either a slightly higher ratio (80:1 gives 8.16 N*m delivered), a motor with more continuous torque, or accepting a lower safety factor if the mass and length estimates are trustworthy. This is the step builders skip most often: sizing against the motor's peak or stall torque number on a datasheet rather than its continuous rating, which is the number that actually matters for a joint holding a static load for more than a few seconds.
Step 5: Continuous vs Peak Torque, and Duty Cycle
Motor datasheets list both a peak (or stall) torque and a continuous torque, sometimes buried in a thermal curve rather than a single number. Peak torque is only available briefly before winding temperature rises past the motor's insulation rating. A joint that has to hold a fixed pose against gravity for extended periods, like a shoulder joint supporting an outstretched arm, is a continuous-duty load and must be sized against the continuous rating, not the peak one, even though the peak number looks far more attractive on a spec sheet.
A joint that only sees torque briefly during a fast move and then relaxes, like a gripper actuator that closes and releases, can be sized closer to the peak rating with a shorter duty cycle, since the winding has time to cool between actuations. Check the motor's thermal time constant against your actual hold times before assuming a peak-rated sizing is safe, and see motor thermal duty cycle sizing for a worked RMS current example of this check.
Putting the Chain Together
- Compute worst-case static torque (gravity on link plus payload) and dynamic torque (moment of inertia times target acceleration), added together.
- Multiply by a safety factor of 1.5 to 2.0 to get the design torque target.
- Divide by the motor's continuous torque rating to get the required gear ratio, then round up to the nearest available gearbox.
- Multiply the motor's continuous torque by the chosen ratio and the gearbox's rated efficiency to verify the delivered torque still clears the design target.
- Confirm whether the joint's actual duty cycle is continuous or intermittent, and size against the matching torque rating rather than the largest number on the datasheet.
Skipping any one of these steps, especially the efficiency check and the continuous-vs-peak distinction, is why a motor that looked adequate on paper ends up stalling or overheating in a real arm. Running the full chain with your own link masses, lengths, and target accelerations before ordering hardware is cheaper than discovering the gap after the joint is already wired up. The same worst-case moment the motor has to overcome also loads the joint's bearings; see the bearing selection worked moment load example for that half of the sizing.
Building or studying robotics?
Arcbotix publishes practical guides on robotics engineering, control systems and real-world builds. Explore more articles on the blog.